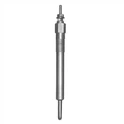
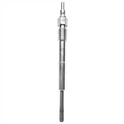
Hey there! As an ISUZU - 4FG1T GLOW PLUG supplier, I've gotten tons of questions about how to install these glow plugs. So, I thought I'd put together this blog post to walk you through the process step by step.


Why Do You Need a Glow Plug?
First off, let's talk about why glow plugs are important. In diesel engines like the ISUZU - 4FG1T, the combustion process relies on high compression to heat the air in the cylinders. But in cold weather, it can be tough for the engine to reach the right temperature quickly. That's where glow plugs come in. They pre - heat the air in the combustion chamber, making it easier for the diesel fuel to ignite. This means smoother starts, especially when it's cold outside.
Tools You'll Need
Before you start the installation, make sure you've got all the necessary tools. You'll need a socket wrench set, a torque wrench, some dielectric grease, and a new set of ISUZU - 4FG1T glow plugs. If you're looking for high - quality glow plugs, check out our Glow Plug Auto Glow Plug for Isuzu 9 - 82511994 - 0 9 - 825111945 - 0 Pi - 40 91mm 22.5v, Glow Plug for Isuzu 8 - 94402303 - 1 Pi - 51 83mm 5v, and Glow Plug for Isuzu 8 - 94241449 - 0 8 - 94255588 - 0 8 - 94221719 - 3 Pi - 46 89mm 5v.
Step 1: Prepare Your Workspace
Safety first! Make sure your engine is completely cool before you start working on it. You don't want to burn yourself on a hot engine. Park your vehicle on a flat surface and engage the parking brake. Open the hood and locate the glow plug relay and the glow plugs themselves. They're usually on top of the engine cylinders.
Step 2: Disconnect the Battery
To avoid any electrical shocks or short circuits, disconnect the negative terminal of your vehicle's battery. This will cut off the power supply to the glow plug system. Just use your socket wrench to loosen the nut on the negative terminal and remove the cable.
Step 3: Remove the Old Glow Plugs
Locate the electrical connectors on the old glow plugs. They're usually small, plastic connectors. Gently pull them off the glow plugs. Be careful not to damage the connectors or the wires.
Next, use your socket wrench to remove the old glow plugs. Turn the socket counter - clockwise to loosen the glow plugs. It might take a bit of force, especially if the glow plugs have been in there for a while. If you're having trouble, you can try using a breaker bar for extra leverage.
Once the glow plugs are loose, carefully pull them out of the engine. You might notice that they're covered in carbon deposits. This is normal, but it's a sign that the old glow plugs were working hard.
Step 4: Inspect the Glow Plug Holes
Take a look at the holes where the old glow plugs were. Make sure there's no debris or carbon buildup in the holes. If there is, you can use a small wire brush to clean them out. This will ensure a good seal when you install the new glow plugs.
Step 5: Apply Dielectric Grease
Before you install the new glow plugs, apply a thin layer of dielectric grease to the threads of the glow plugs. This will help prevent corrosion and make it easier to remove the glow plugs in the future. Just use a small amount - you don't want to get grease on the tip of the glow plug.
Step 6: Install the New Glow Plugs
Carefully insert the new glow plugs into the holes in the engine. Turn them clockwise by hand until they're snug. Then, use your torque wrench to tighten them to the manufacturer's recommended torque specification. This is really important - if you overtighten the glow plugs, you could damage the engine block.
Step 7: Reconnect the Electrical Connectors
Once the glow plugs are installed, reconnect the electrical connectors. Make sure they're firmly attached to the glow plugs. You should hear a little click when they're properly connected.
Step 8: Reconnect the Battery
Now that the new glow plugs are installed and the electrical connectors are reconnected, it's time to reconnect the negative terminal of the battery. Use your socket wrench to tighten the nut on the negative terminal.
Step 9: Test the Glow Plugs
Before you start your engine, it's a good idea to test the glow plugs. Turn the ignition key to the "On" position (but don't start the engine). You should see the glow plug indicator light on your dashboard come on. This means the glow plugs are working. Wait a few seconds for the light to go off, and then start your engine.
If your engine starts smoothly, especially in cold weather, then you've done a great job installing the new glow plugs. If you're still having trouble starting your engine, there might be other issues with your glow plug system, and you might need to consult a professional mechanic.
Tips and Tricks
- Keep track of which glow plug came out of which cylinder. This will make it easier to install the new ones in the right place.
- If you're having trouble removing the old glow plugs, you can try heating them up slightly with a heat gun. Just be careful not to overheat the engine block.
- Always follow the manufacturer's instructions when it comes to torque specifications. Overtightening or undertightening the glow plugs can cause problems.
Conclusion
Installing ISUZU - 4FG1T glow plugs isn't too difficult if you follow these steps. Just take your time, be careful, and make sure you use high - quality glow plugs. If you have any questions or need help finding the right glow plugs for your vehicle, don't hesitate to reach out. We're here to help you with all your ISUZU - 4FG1T glow plug needs. Whether you're a DIY enthusiast or a professional mechanic, we've got the products you need at great prices. So, if you're in the market for new glow plugs, get in touch for a purchase and negotiation.
References
- ISUZU - 4FG1T engine user manual
- Automotive repair guides for diesel engines