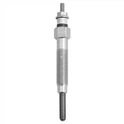
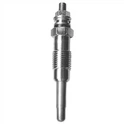
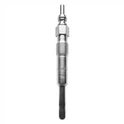
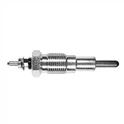
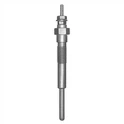
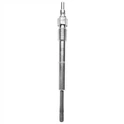
How to Replace a 10.5V Heater Glow Plug
As a supplier of 10.5V heater glow plugs, I understand the importance of knowing how to replace these crucial components. Glow plugs play a vital role in diesel engines, especially in cold weather conditions. They pre - heat the combustion chamber to ensure a smooth start for the engine. In this blog, I'll guide you through the process of replacing a 10.5V heater glow plug step by step.


Tools and Materials Needed
Before you start the replacement process, gather the following tools and materials:
- A socket wrench set: You'll need the appropriate socket size to remove the old glow plug and install the new one.
- A torque wrench: This is essential to ensure that the new glow plug is tightened to the correct torque specification.
- A new 10.5V heater glow plug: Make sure it is compatible with your vehicle's make and model. You can find a variety of glow plugs on our website, such as the Glow Plug for Isuzu Red 12v 0k054 - 18140, Glow Plug for Isuzu Cp - bst - 063 - 11v, and Glow Plug Auto Glow Plug for Isuzu 9 - 82511994 - 0 9 - 825111945 - 0 Pi - 40 91mm 22.5v.
- Anti - seize compound: This helps prevent the new glow plug from seizing in the cylinder head.
- Safety glasses and gloves: To protect your eyes and hands during the process.
Step 1: Prepare the Vehicle
- Park the vehicle on a level surface and engage the parking brake.
- Turn off the engine and allow it to cool down completely. Working on a hot engine can cause serious burns.
- Open the hood and locate the battery. Disconnect the negative terminal of the battery to prevent any electrical shocks or short - circuits during the replacement process.
Step 2: Locate the Glow Plugs
- Refer to your vehicle's owner's manual to find the exact location of the glow plugs. In most diesel engines, the glow plugs are located on the cylinder head.
- Once you've located the glow plugs, visually inspect the area around them for any signs of damage, corrosion, or oil leaks. If you notice any issues, address them before proceeding with the replacement.
Step 3: Remove the Old Glow Plug
- Put on your safety glasses and gloves.
- Use the appropriate socket wrench to loosen the nut or bolt that secures the electrical connector to the glow plug. Carefully remove the electrical connector from the old glow plug.
- Place the socket on the glow plug and use the socket wrench to loosen the glow plug. Turn the wrench counter - clockwise. Be careful not to apply too much force, as this could damage the glow plug or the cylinder head.
- Once the glow plug is loose, use your fingers to carefully remove it from the cylinder head. Inspect the old glow plug for any signs of damage, such as a broken tip or excessive carbon buildup.
Step 4: Prepare the New Glow Plug
- Take the new 10.5V heater glow plug out of its packaging.
- Apply a thin layer of anti - seize compound to the threads of the new glow plug. This will make it easier to remove the glow plug in the future and prevent it from seizing in the cylinder head.
Step 5: Install the New Glow Plug
- Carefully insert the new glow plug into the cylinder head. Make sure it is aligned correctly and starts to thread in smoothly.
- Use the socket wrench to tighten the glow plug by hand until it is snug.
- Use the torque wrench to tighten the glow plug to the manufacturer's recommended torque specification. Over - tightening the glow plug can cause damage to the cylinder head, while under - tightening can lead to leaks and poor performance.
Step 6: Reconnect the Electrical Connector
- Reconnect the electrical connector to the new glow plug. Make sure it is securely attached and that there are no loose connections.
- Tighten the nut or bolt that secures the electrical connector to the glow plug using the socket wrench.
Step 7: Reconnect the Battery
- Reconnect the negative terminal of the battery. Make sure it is tightened securely.
Step 8: Test the New Glow Plug
- Start the engine and let it run for a few minutes. Listen for any unusual noises or vibrations.
- Check for any signs of leaks around the new glow plug. If you notice any leaks, turn off the engine immediately and re - check the installation.
Tips and Precautions
- Always follow the manufacturer's instructions and torque specifications when replacing a glow plug.
- If you're unsure about any step of the replacement process, consult a professional mechanic.
- Regularly inspect your glow plugs for signs of wear and tear. Replace them as recommended by your vehicle's manufacturer.
Conclusion
Replacing a 10.5V heater glow plug is a relatively straightforward process if you have the right tools and follow the steps carefully. By doing so, you can ensure that your diesel engine starts smoothly, especially in cold weather. If you're in need of high - quality 10.5V heater glow plugs or have any questions about the replacement process, don't hesitate to contact us for more information and to discuss your procurement needs.
References
- Vehicle owner's manuals
- Manufacturer's specifications for glow plugs